Archive for Configuration Category Feed

Part 3 of the O’Reilly Salesforce.com series was posted

Part 3 of the the O’Reilly Network’s 3-part series about Salesforce.com was posted today. It’s called Packaging for Salesforce.com’s AppExchange.

I updated my original post with the a link to part 3. You can get to all of them from there.

Comments off comments feed

Map a custom lead field to 2 places

There have been many instances on projects where I have needed/wanted to map a lead field to 2 places. For example, on my most recent project we are using custom address fields. We wanted to do this to have better control over data quality. Using a picklist value for country coupled with Winter 07 Validation Rules, we have the ability to put pretty tight restrictions on the data that gets entered (e.g. forcing a 2 character state/province code when the country = “United States” or “Canada”). This aids in overall reporting, Territory Manager rules once the lead is converted and in Lead Assignment rules.

One of the things you give up when you do this is the ability to map those custom address fields on a Lead to both the Account and Contact like the standard Address fields do.

Pre-Winter 07

In the pre-Winter 07 world, doing this required a user to run an s-control or to have a polling application look for recently converted records and copy the address to the 2nd location. I had been able to use Formula Fields to get painfully close to making creating a 2nd copy of a field and mapping it, but when trying to save a mapping from a formula field on a Lead to a text field, I’d get an error that field sizes didn’t match. Big headache.

With Winter 07

Now that Winter 07 is here, I am able to use Field Update workflow rules to make a second copy of Lead data so that I can map that second copy to my Contact record. To do this:

  1. Create a copy of each Lead field you want mapped to a 2nd object
  2. Map the copied Lead fields to the Account, Contact or Opportunity fields they should be mapped to
  3. Create Workflow Rules on the Lead object that use Field Updates to update these new fields with the values of your original fields
  4. Test it out. It should work

Some tips:

  • Choose to evaluate your workflow rule “Every time a record is created or edited” so that your rule is always evaluated.
  • Use criteria that will always be met like Created Date > 1/1/2000so that the data is always copied to those new fields.
  • To avoid confusion for end-users, use Field Level Security to hide those copied fields from view. This way your users won’t see them on report screens and wonder what they are. Even if you hide the field from everyone, workflow can still see it and update it.
Doh!

There is 1 snag. Formula fields (which you need to do the Field Updates) have to use the ISPICKVAL function to get a value from a picklist. If you have a sizable amount of picklist values, you won’t have enough formula space to make this work. I hit that on my Country picklist.

Future

In the future, you should be able to use APEX code to intercept the Convert logic and map those custom lead fields to 2 places.

Better yet is a simpler approach that will make it so you aren’t doing all kinds of workarounds or coding in your configuration. Vote for these Ideas that Salesforce customers have already requested:

Comments (5) comments feed

3-part series about Salesforce.com on the O’Reilly Network

Tony Stubblebine just posted part 2 of his 3-part series on how to build and distribute applications on Salesforce.com’s AppExchange. The series is being published on the O’Reilly Network. Links have been permanently added to my blog sidebar, but here they are again:

Part 1 of 3 – An Introduction to Salesforce.com’s AppExchange: Tony lays out the basic information that any developer should know to get started. This article provides some context and points to how a developer can get their hands on a free Developer Edition account.

Part 2 of 3 – Using the Salesforce.com API: Tony explains how the Salesforce API works by creating a PERL script that automatically creates Salesforce.com Leads for every comment posted on a blog. This is a well-rounded example because it explains how to use the API and also how it impacts the back-end (inside Salesforce).

Part 3 of 3 – Packaging for Salesforce.com’s AppExchange: Tony continues building the blog-to-lead application by walking through the process of packaging and uploading to the Salesforce AppExchange.

Comments (1) comments feed

Provide a “chat with your admin” support feature in your org

Mark at salesforcewatch.com posted a nice solution for using a free service called Meebo to provide a way for users to chat with the salesforce admin.

This is a creative idea for Salesforce support. It allows users to spend very little time to get their basic questions answered. It’s usually the answers to the little questions that add a lot to productivity.

Check it out

Comments off comments feed

Open custom links in the same window without creating nested frames

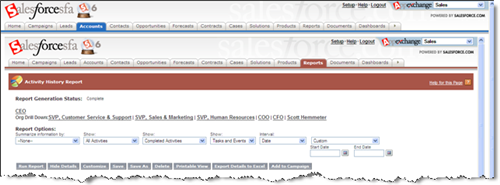
If you use custom links regularly, you know about this issue. It’s an issue when you decide to open custom links in the existing window rather than a popup window. You can get nested frames where the entire Salesforce.com application is within the frame where the data should reside like in the screen shot below. For this screen shot, I had a custom link from the Account Page Layout to a specific report. I chose to Open in Salesforce window without sidebar.

nested_frames.png

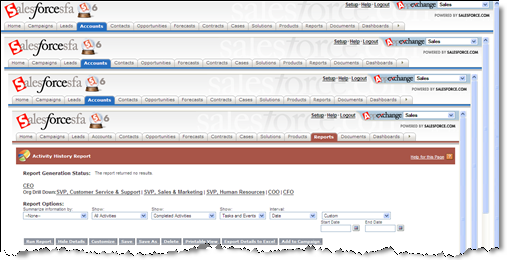
If I run the custom link 3 times in a row, my screen now looks like this.

nested_frames2.png

You get the idea.

Because of this issue, many people opt for using pop-up windows instead. This can be somewhat annoying to an end user, though. We have pop-up blockers now because people don’t like this. Why open another window? You can fix this problem, by using a simple S-Control for your custom link rather than using a direct URL. All you need to do is copy the code below. Where it says {URL GOES HERE}, replace that with the same URL you put in your Custom Link.

< script language="JavaScript">

function redirect()
{
parent.frames.location.replace(“{URL GOES HERE}”);
}

redirect();

< /script >

Note: In order for the code to appear on this blog post I had to add a space in the < script> and < /script> tags. You’ll need to remove those spaces too.

Combine this trick with my old post about Auto-creating reports from web links to do some dynamic reporting right from record (e.g. run an Activity History report for a specific account right from the Account page).

Comments (7) comments feed

Next entries » · « Previous entries